Highlight active menu entry with Symfony UX Components

I was working on my sideproject and tried out Symfony UX Live Components. As I’m testing my code again to see if a list is working with components as intended I saw the highlighted menu item. That menu item wasn’t active so I asked myself if it is possible to achive this with Live Components.

In this blog-post I’m going to explain how to do this and my thoughts about this feature. I’ll not talk about setup symfony or talk about why every advancing developer should have a side-project or some “go-to” project ideas to test new technologies.

What are Live Components

Symfony UX Live Components provides reusable components that one can bind to an object. These components do not need any javascript to work.

It needs some practice to get used to it. I worked with the default examples of an alert message and was convinced I‘ll try to use it.

The default example didn‘t convice me at first so I worked with it a bit more. I created a list of users with it, which worked fine. I looked at my side project‘s menu and thought if it is possible to highlight the active menu without any javascript.

It may not be the most performant way to handle it but is a more advanced example for Syfmony UX Live Components.

Goal

I want to be able to click on a menu item, be redirected to this page and see a highlighted menu item so I know where I am.

I want to use no or as little Javascript as possible.

Get started

The file examples are centered around the components, that my project needs to enable the active menu and are not giving a working example project in the end. Nevertheless it may not require much to get it to work

Templates

Include the menu component in the file you would like your menu to be loaded

{# base.html.twig #}

...
    {% block menu %}
        {# Menu is loaded in a way that it can access the 'outer.' variables #}
        {% component('Menu') %}
        {% endcomponent %}
    {% endblock %}
...

Now the menu component with 2 example entries

{# templates/components/Menu.html.twig #}

{% set homeActive = outerScope.homeActive|default('') %}
{% set contractListActive = outerScope.contractListActive|default('') %}

<nav class="navbar navbar-expand-lg bg-body-secondary mb-2">
    <div class="container-fluid">
        <a class="navbar-brand" href="https://spacetraders.io">Spacetraders Implementation</a>
        <button class="navbar-toggler" type="button" data-bs-toggle="collapse" data-bs-target="#navbarSupportedContent" aria-controls="navbarSupportedContent" aria-expanded="false" aria-label="Toggle navigation">
            <span class="navbar-toggler-icon"></span>
        </button>
        <div class="collapse navbar-collapse" id="navbarSupportedContent">
            <ul class="navbar-nav nav-underline me-auto mb-2 mb-lg-0">
                <li class="nav-item">
                    <a class="nav-link {{ homeActive }}" aria-current="page" href="/">Home</a>
                </li>
                <li class="nav-item">
                    <a href="{{ path('contract.list') }}" class="nav-link {{ contractListActive }}">Contract List</a>
                </li>
            </ul>
        </div>
    </div>
</nav>

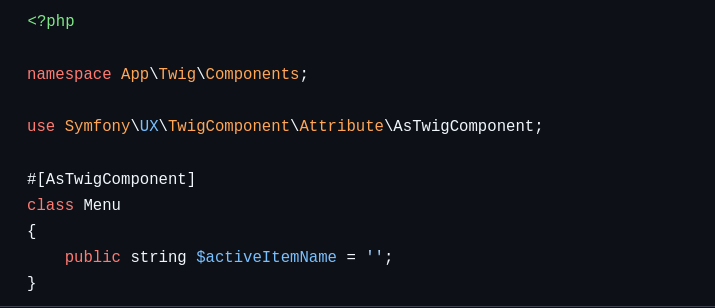
This only provides the html part for the components, we need some php content now to get it to work.

// src/Twig/Components/Menu.php

namespace App\Twig\Components;

use Symfony\UX\TwigComponent\Attribute\AsTwigComponent;

#[AsTwigComponent]
class Menu
{
    public string $activeItemName = '';
}

This is our basic framework to enable our highlighting.

In a template it is used via

{# contracts/list.html.twig #}

{% extends 'base.html.twig' %}

{% block menu %}
    {% set contractListActive = 'active' %}
    {{ parent() }}
{% endblock  %}

How does it work now?

The magic happens with the in these lines

{# contracts/list.html.twig #}

{% set contractListActive = 'active' %}
{{ parent() }}

---------------------------------------------

{# templates/components/Menu.html.twig #}

{% set contractListActive = outerScope.contractListActive|default('') %}

I’m setting the contractListActive and am just calling parent() inside the menu block.
Inside the menu component did you notice the outerScope. in front of the variable name? This tells twig to look for a variable in the upper scope. More information about that in the syfmony ux documentation .
Now the variable is set to active and passed into the template to highlight the active menu.

I think this is a solution in case it is neccessary to create a higlighting feature without javascript or you may find some other useful cases for this.

Contact

For further questions or feedback
Mastodon: @florian25686@phpc.social
Github: florian25686
E-Mail: hello-blog at flexibledeveloper.eu

Convert pdf to png on ubuntu

To convert a pdf document to an png document one can use the terminal.
– Install imagemagick on your system
– Open the folder that holds your pdf document in the terminal
convert -density 150 {filename.pdf} -quality 90 {filename.png}

Each page from the pdf document is now a png file.

Enable Twig Components in Pimcore

I installed Symfony’s Twig Components in Pimcore to test if and how to do that.

A small warning ahead: This feature is still experimental, as their documentation titles.

To install the components in Pimcore simply install the components bundle via composer

composer require symfony/ux-twig-component

Now you need to tell Pimcore about this bundle in config/bundles.php

// config/bundles.php
return [
...
Symfony\UX\TwigComponent\TwigComponentBundle::class => ['all' => true],
];

It is installed and ready to be setup.
Depending on the specific setup these steps might vary, adjust accordingly

  1. Register the components in the services.yaml and make them public
  2. Create the components-class
  3. Create the components-template
  4. Use the template in your code e.g. the default-template
// services.yaml
AppBundle\Components\:
    resource: '../../Components'
    public: true
// src/Components/AlertComponent.php
namespace App\Components;

use Symfony\UX\TwigComponent\Attribute\AsTwigComponent;

#[AsTwigComponent('alert')]
class AlertComponent
{
    public string $type = 'success';
    public string $message;
}
{# templates/components/alert.html.twig #}
<div class="alert alert-{{ type }}">
    {{ message }}
</div>
{{ component('alert', { message: 'Hello Twig Components!' }) }}

Software sollte dem User dienen

Meinung zu TikTok-Feature und ungleiche Machtverteilung bei Software

Heise.de (Link) hat über einen neuen automatischen “Filter” bei Tiktok berichtet Quelle. Dieser Filter verändert automatisch das Gesicht des Users (Kinnpartie) und die Haut (Weichzeichner) ohne, dass diese Option dekativiert werden kann.

Tiktok hat diesen “Fehler” nach Anfrage behoben.

Ich finde das ein sehr tolles Beispiel dafür wieviel Macht die Programmierer der Software bei Closed-Source-Progammen gegenüber den Usern haben. Wird ein solches “Feature” aktiviert können die User nur darauf hoffen, dass die Entwickler so nett sind und eine Option zum Deaktivieren anbieten oder das Feature wieder entfernen.

Bei Open-Source-Software kann ich als User ein Programm selbst anpassen (anpassen lassen) und dieses dann weiter verwenden.

Find all missing entries in two files

I have two csv-Files containing 30k customer information and should only return the customers missing in file1. Usecase: accidentially deleted some data (~1800) and need to import the deleted one, instead of importing 30k data and skip if they exist.

I did this via a small shell-script. The script can be downloaded and used here:

View Gist on Github

This is the magic

grep -v -f <(tr ',' '\n' < "${patterns}") "${search}"

-v negates the search

Pimcore: Create pages via PHP-Code (incl. editables)

I was given the task to create pages of existing data. The challenge: the pages contain editables and these editables should be filled by pre-existing data.

All editables must be created prior to creating pages with the content.

A editable consists of one or multiple elements. each element must be created individually and later added to the areablock which than is saved as a page.

The areablock is created with a name and later on all content gets connected via the name. In this example it is named content for the ease of use.

This code creates a page construct, sets editables and saves it to the database

<?php

$editablesOnPage = [];

$pageInformationYouWantToCreate = [
    'page_title' => 'My first page',
    'folder_path' => '/',
    'seo_description' => 'Pages seo description',
    'seo_title' => 'Seo Title, if needed',

];

$positionOnPageFor = [
    'headline' => 1,
    'wysiwyg' => 2,
];

$foldertoCreateThePageUnder = 1; // Root folder id
$areaBlockName = 'content';

$importPage = new \Pimcore\Model\Document\Page();
$importPage->setKey($pageInformationYouWantToCreate['page_title']);
$importPage->setPath($pageInformationYouWantToCreate['folder_path']);
$importPage->setType('page');
$importPage->setTitle($pageInformationYouWantToCreate['page_title']);
$importPage->setDescription($pageInformationYouWantToCreate['seo_description']);
$importPage->setMetaData([
    'seoTitle' => $pageInformationYouWantToCreate['seo_title'],
]);
$importPage->setParentId($foldertoCreateThePageUnder);
$importPage->setController('Default');

$blockArea = new \Pimcore\Model\Document\Editable\Areablock();
$blockArea->setName($areaBlockName);

// Headline
if ($pageInformationYouWantToCreate['headline_title']) {
    $headline = new \Pimcore\Model\Document\Editable\Input();
    $headline->setName(sprintf('%s:%s.title', $areaBlockName, $positionOnPageFor['headline']));
    $headline->setDataFromEditmode($pageInformationYouWantToCreate['headline_title']);
    $editablesOnPage[] = $headline;
}

// Wysiwyg
if ($pageInformationYouWantToCreate['content_text']) {
    $wysiwygComponent = new \Pimcore\Model\Document\Editable\Wysiwyg();
    $wysiwygComponent->setName(sprintf('%s:%s.text', $areaBlockName, $positionOnPageFor['wysiwyg']));
    $wysiwygComponent->setDataFromEditmode($pageInformationYouWantToCreate['content_text']);
    $editablesOnPage[] = $wysiwygComponent;
}

$blockArea->setDataFromEditmode([
    [
        'key'    => $pageInformationYouWantToCreate['headline'],
        'type'   => 'heading',
        'hidden' => false,
    ],
    [
        'key'    => $pageInformationYouWantToCreate['wysiwyg'],
        'type'   => 'wysiwyg',
        'hidden' => false,
    ]
]);

array_unshift($editablesOnPage, $blockArea);
$importPage->setEditables($editablesOnPage);

$importPage->save();

Einmal Apple und zurück

Ich hab mir vor Jahren einen iPod Nano 4th Generation gekauft und war immer sehr zufrieden damit. Ich konnte normale 3,5mm Kopfhörher verwenden, auch solche die nicht von Apple waren, und mit meinem damaligen Windows- und Linux-Rechner Musik aufspielen.
Nachdem dieser iPod in die Jahre gekommen ist kaufte ich mir einen neuen iPod, mein erstes Apple-Gerät, dass komplett auf Touch basiert. Selbst bei diesem iPod hatte ich noch die Möglichkeit mit Linux Musik aufzuspielen und selbst in alten Autos mit Kasseten-Radio konnte ich den iPod noch verwenden.

Apple stellte zwar mit iTunes eine einfach Möglichkeit zur Verfügung Musik zu verwalten, aber es war nicht ausschließlich über iTunes möglich.

Es folgten weitere Apple Produkte, iPhone 7, MacBook Pro, iPhone 11 und Apple Watch.

Die einfache Integration auf Linux-Basis macht es sehr attraktiv und einfach zu nutzen, der “Vendor lock-in” die Abhängigkeit von einem Anbieter empfand ich damals nicht so schlimm.

Es gab regelmäßige Updates, bei Android haben mich die fehlenden Updates nach kurzer Zeit (1 – 2 Jahre) immer gestört. Somit war nach kurzer Zeit das Handy ohne Sicherheitsupdates und auch neue Android-Versionen gab es somit eher selten. Auch ein zu dieser Zeit “Flagship Modell” stellte keine Garantie da Updates oder neue Android-Versionen zu bekommen.

Subjektiv war es für mich zu dieser Zeit auch noch nicht so schlimm. Wie bei Drogendealern: der erste Schuss ist gratis und von da an gings bergab.

Schlimmer mit jedem Update

Meine Reise ins Apple-Land begann 2015 mit meinem MacBook Pro. Brav wie ich bin hab ich auch immer schön die Updates installiert und mehr und mehr auf die mitgelieferte Software gesetzt: Pages, Numbers, Mail und Fotos. Es hat wunderbar funktioniert und war schön mit dem iPhones integriert.

Nach und nach kamen Systemupdates und damit auch neue Feature. Eines der Gründe für Apple waren regelmäßige Sicherheitsupdates, auch auf dem iPhone, die ich gerne eingespielt habe.

Beim iPhone war es dann nach und nach nichtmehr möglich von anderen Systemen (wie Ubuntu) direkt auf die Fotos zuzugreifen oder Dateien wie mp3 auzutauschen.
MacOS sendet jedes Programm, dass geöffnet wird an Apple zur “Überprüfung” ob das Programm zugelassen ist. Mit welchem Recht darf Apple denn wissen welches Programm ich wann und wie oft am Tag nutze?

Zum Glück gibt es freie Alternativen und ich kann auf meinem MacBook recht einfach Ubuntu installieren. Dank der neuen “Sicherheits”-Chips ist dies nichtmehr ohne weiteres möglich auf neueren MacBooks.

Die Hardware funktioniert noch super und nach den Jahren ohne Probleme, die Software ist das Problem, aber es hat sich ja zum Glück einfach austauschen lassen.
Beim iPhone wird es hier schon schwieriger.

Weitere Updates folgen.

Create custom form themes for Dachcoms Formbuilder Plugin in Pimcore

From time to time you want to overwrite the default templates for forms in pimcore.
I had some problems to find the information I need as they are spreaded widley.

To get it to work it should look like this:

Filestructure

# src/AppBundle/Resources/config/pimcore/config.yml
form_builder:
form:
templates:
ivoclar_div_layout:
value: 'my_form_div_layout.html.twig'
label: 'Custom form layout'
default: true
{# tempaltes/bundles/FormBuilderBundle/Form/Theme/Macro/my_form_div_layout.html.twig #}
{% macro form_builder_form_head() %}
{% endmacro %}

{% macro form_builder_form_foot() %}
{% endmacro %}

{% macro form_builder_form_message(flash_messages) %}
{% if flash_messages is not empty %}
{% for label, messages in flash_messages %}
{% for message in messages %}
<div class="message message-{{ label }}">
{{ message|raw }}
</div>
{% endfor %}
{% endfor %}
{% endif %}
{% endmacro %}
{# tempaltes/bundles/FormBuilderBundle/Form/Theme/my_form_div_layout.html.twig #}
{% extends "form_div_layout.html.twig" %}

{%- block widget_attributes -%}
id="{{ id }}" name="{{ name }}"
{%- if disabled %} disabled="disabled"{% endif -%}
{%- if required %} required="required"{% endif -%}
{{ block('attributes') }}
{%- endblock widget_attributes -%}

Overwrite field-names with a template

In Pimcore I’m using https://github.com/dachcom-digital/pimcore-formbuilder to create input forms in my project.
I have the problem that the default input names are not the once I need for my task.

Default names
<input .. name="formbuilder_1[task]"
<input .. name="task"

I created a form theme to overwrite it

{# /templates/bundles/FormBuilderBundle/Form/Theme/myform_div_layout.html.twig #}
{% extends "form_div_layout.html.twig" %}

{%- block widget_attributes -%}
    id="{{ id }}" name="{{ name }}"
    {%- if disabled %} disabled="disabled"{% endif -%}
    {%- if required %} required="required"{% endif -%}
    {{ block('attributes') }}
{%- endblock widget_attributes -%}

The default name is {{full_name}}, replaced with {{name}} returns the fieldname I’ve set in the formbuilder form.

Toniebox und die Cloud

Liebe Eltern: lest die AGB’s solcher Spielzeuge für Kinder

Hier ein Auszug aus den AGB’s der Toniebox

Phoniebox AGB Stand: 06.07.2020 19:39 Uhr

Ich habe hier nicht schlecht geschaut was sie dann alles wissen.

Warum ist das denn so schlimm?

Ganz einfach: alles was ein Kind mit der Box macht, egal was, wird an den Hersteller geschickt. Was ist denn daran so schlimm? Der Hersteller kann aus den Daten alles Mögliche sehen

  • Wann steht das Kind auf
  • Wann geht es ins Bett
  • Gibt es bestimmte Lieder die zur selben Zeit laufen (Gute-Nacht-Lied, Lieblingslied)
  • Welche Titel werden übersprungen
  • Geburtstag (es kommen während des Jahres an einem Tag immer neue Figuren hinzu)
  • Funktioniert die Werbung für Toniefiguren (Eltern kriegen Werbung für die Figuren, bestellen diese dann oder leihen sie aus, das Kind spielt diese dann ab)
  • Stimmung des Kindes könnte anhand der gespielten Lieder abgelesen werden
  • Wie oft spielt das Kind an der Toniebox (könnte Rückschluss geben ob das Kind viel alleine spielt)

Das sind nur einige Punkte die mir einfallen, wass mit den Daten möglich ist. Gleicht man dann noch die Mailadresse des Cloud-Account-Erstellers mit einem Werbenetzwerk ab ergeben sich seehr viele tolle Möglichkeiten euch zum Kauf zu verleiten.

Meine Probleme mit der Cloud

Ihr entscheidet euch für die Toniebox und den Cloudaccount, der “anonym” erstellt werden kann und es müssen ganz wenig Daten angegeben werden. Nun die Toniebox funktioniert nicht ohne Cloud.
Eine neu gekaufte Figur funktioniert nur, wenn die Toniebox Zugang zur Cloud hat um die Daten nachzuladen. Ohne diesen Zugang: keine Musik.
Wer in Gegenden mit schlechtem Internet wohnt oder nur einen LTE-Router hat wird darüber nicht begeistert sein.
Die Box lädt sich die Musik herunter und speichert diese auf der Box selbst zur Verwendung ohne Internet, im Auto oder bei Freunden.
Der interne Speicher ist begrenzt und es werden einfach ältere Lieder überspielt und müssen bei Bedarf neu geladen werden.

Soweit ich es gefunden habe sind nur 8GB interner Speicher verbaut. Wer viele Hörbücher etc hat muss diese unter Umständen nachladen.

Money for nothing

Der Hersteller beschließt plötzlich 5 oder 10 € im Monat für die Clouddienste zu verlagen. Die Kinder sind schon so dran gewöhnt, dass man das als Eltern vmtl zahlen würde oder eine nutzlose Box zu Hause stehen hat die keine neuen Lieder mehr laden kann.

Abschaltung oder Probleme mit der Cloud beim Hersteller

Wo Menschen arbeiten passieren Fehler, das ist normal und auch gut so, daraus kann man lernen. Was passiert wenn die Cloud nichtmehr erreichbar ist aber das Kind Geburtstag hat und viele neue Figuren geschenkt bekommt die zwar auf der Toniebox stehen können aber keine Musik spielen?

Auch schon geschehen: Firmen mit Cloud diensten wurden gekauft und die Dienste abgeschaltet. Was macht ihr dann mit der Toniebox?
Die Toniebox kann leider nicht anders bespielt werden als durch die Cloud.

Fazit

Die Toniebox kommt für mein Kind nicht in Frage und schon gar nicht in mein WLAN.