Highlight active menu entry with Symfony UX Components

I was working on my sideproject and tried out Symfony UX Live Components. As I’m testing my code again to see if a list is working with components as intended I saw the highlighted menu item. That menu item wasn’t active so I asked myself if it is possible to achive this with Live Components.

In this blog-post I’m going to explain how to do this and my thoughts about this feature. I’ll not talk about setup symfony or talk about why every advancing developer should have a side-project or some “go-to” project ideas to test new technologies.

What are Live Components

Symfony UX Live Components provides reusable components that one can bind to an object. These components do not need any javascript to work.

It needs some practice to get used to it. I worked with the default examples of an alert message and was convinced I‘ll try to use it.

The default example didn‘t convice me at first so I worked with it a bit more. I created a list of users with it, which worked fine. I looked at my side project‘s menu and thought if it is possible to highlight the active menu without any javascript.

It may not be the most performant way to handle it but is a more advanced example for Syfmony UX Live Components.

Goal

I want to be able to click on a menu item, be redirected to this page and see a highlighted menu item so I know where I am.

I want to use no or as little Javascript as possible.

Get started

The file examples are centered around the components, that my project needs to enable the active menu and are not giving a working example project in the end. Nevertheless it may not require much to get it to work

Templates

Include the menu component in the file you would like your menu to be loaded

{# base.html.twig #}

...
    {% block menu %}
        {# Menu is loaded in a way that it can access the 'outer.' variables #}
        {% component('Menu') %}
        {% endcomponent %}
    {% endblock %}
...

Now the menu component with 2 example entries

{# templates/components/Menu.html.twig #}

{% set homeActive = outerScope.homeActive|default('') %}
{% set contractListActive = outerScope.contractListActive|default('') %}

<nav class="navbar navbar-expand-lg bg-body-secondary mb-2">
    <div class="container-fluid">
        <a class="navbar-brand" href="https://spacetraders.io">Spacetraders Implementation</a>
        <button class="navbar-toggler" type="button" data-bs-toggle="collapse" data-bs-target="#navbarSupportedContent" aria-controls="navbarSupportedContent" aria-expanded="false" aria-label="Toggle navigation">
            <span class="navbar-toggler-icon"></span>
        </button>
        <div class="collapse navbar-collapse" id="navbarSupportedContent">
            <ul class="navbar-nav nav-underline me-auto mb-2 mb-lg-0">
                <li class="nav-item">
                    <a class="nav-link {{ homeActive }}" aria-current="page" href="/">Home</a>
                </li>
                <li class="nav-item">
                    <a href="{{ path('contract.list') }}" class="nav-link {{ contractListActive }}">Contract List</a>
                </li>
            </ul>
        </div>
    </div>
</nav>

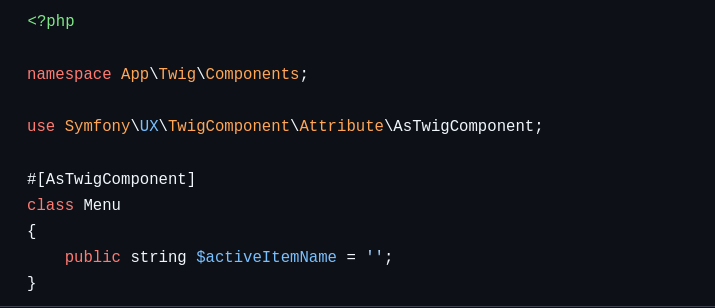
This only provides the html part for the components, we need some php content now to get it to work.

// src/Twig/Components/Menu.php

namespace App\Twig\Components;

use Symfony\UX\TwigComponent\Attribute\AsTwigComponent;

#[AsTwigComponent]
class Menu
{
    public string $activeItemName = '';
}

This is our basic framework to enable our highlighting.

In a template it is used via

{# contracts/list.html.twig #}

{% extends 'base.html.twig' %}

{% block menu %}
    {% set contractListActive = 'active' %}
    {{ parent() }}
{% endblock  %}

How does it work now?

The magic happens with the in these lines

{# contracts/list.html.twig #}

{% set contractListActive = 'active' %}
{{ parent() }}

---------------------------------------------

{# templates/components/Menu.html.twig #}

{% set contractListActive = outerScope.contractListActive|default('') %}

I’m setting the contractListActive and am just calling parent() inside the menu block.
Inside the menu component did you notice the outerScope. in front of the variable name? This tells twig to look for a variable in the upper scope. More information about that in the syfmony ux documentation .
Now the variable is set to active and passed into the template to highlight the active menu.

I think this is a solution in case it is neccessary to create a higlighting feature without javascript or you may find some other useful cases for this.

Contact

For further questions or feedback
Mastodon: @florian25686@phpc.social
Github: florian25686
E-Mail: hello-blog at flexibledeveloper.eu
Enable Twig Components in Pimcore

I installed Symfony’s Twig Components in Pimcore to test if and how to do that.

A small warning ahead: This feature is still experimental, as their documentation titles.

To install the components in Pimcore simply install the components bundle via composer

composer require symfony/ux-twig-component

Now you need to tell Pimcore about this bundle in config/bundles.php

// config/bundles.php
return [
...
Symfony\UX\TwigComponent\TwigComponentBundle::class => ['all' => true],
];

It is installed and ready to be setup.
Depending on the specific setup these steps might vary, adjust accordingly

  1. Register the components in the services.yaml and make them public
  2. Create the components-class
  3. Create the components-template
  4. Use the template in your code e.g. the default-template
// services.yaml
AppBundle\Components\:
    resource: '../../Components'
    public: true
// src/Components/AlertComponent.php
namespace App\Components;

use Symfony\UX\TwigComponent\Attribute\AsTwigComponent;

#[AsTwigComponent('alert')]
class AlertComponent
{
    public string $type = 'success';
    public string $message;
}
{# templates/components/alert.html.twig #}
<div class="alert alert-{{ type }}">
    {{ message }}
</div>
{{ component('alert', { message: 'Hello Twig Components!' }) }}

Find all missing entries in two files

I have two csv-Files containing 30k customer information and should only return the customers missing in file1. Usecase: accidentially deleted some data (~1800) and need to import the deleted one, instead of importing 30k data and skip if they exist.

I did this via a small shell-script. The script can be downloaded and used here:

View Gist on Github

This is the magic

grep -v -f <(tr ',' '\n' < "${patterns}") "${search}"

-v negates the search

Pimcore: Create pages via PHP-Code (incl. editables)

I was given the task to create pages of existing data. The challenge: the pages contain editables and these editables should be filled by pre-existing data.

All editables must be created prior to creating pages with the content.

A editable consists of one or multiple elements. each element must be created individually and later added to the areablock which than is saved as a page.

The areablock is created with a name and later on all content gets connected via the name. In this example it is named content for the ease of use.

This code creates a page construct, sets editables and saves it to the database

<?php

$editablesOnPage = [];

$pageInformationYouWantToCreate = [
    'page_title' => 'My first page',
    'folder_path' => '/',
    'seo_description' => 'Pages seo description',
    'seo_title' => 'Seo Title, if needed',

];

$positionOnPageFor = [
    'headline' => 1,
    'wysiwyg' => 2,
];

$foldertoCreateThePageUnder = 1; // Root folder id
$areaBlockName = 'content';

$importPage = new \Pimcore\Model\Document\Page();
$importPage->setKey($pageInformationYouWantToCreate['page_title']);
$importPage->setPath($pageInformationYouWantToCreate['folder_path']);
$importPage->setType('page');
$importPage->setTitle($pageInformationYouWantToCreate['page_title']);
$importPage->setDescription($pageInformationYouWantToCreate['seo_description']);
$importPage->setMetaData([
    'seoTitle' => $pageInformationYouWantToCreate['seo_title'],
]);
$importPage->setParentId($foldertoCreateThePageUnder);
$importPage->setController('Default');

$blockArea = new \Pimcore\Model\Document\Editable\Areablock();
$blockArea->setName($areaBlockName);

// Headline
if ($pageInformationYouWantToCreate['headline_title']) {
    $headline = new \Pimcore\Model\Document\Editable\Input();
    $headline->setName(sprintf('%s:%s.title', $areaBlockName, $positionOnPageFor['headline']));
    $headline->setDataFromEditmode($pageInformationYouWantToCreate['headline_title']);
    $editablesOnPage[] = $headline;
}

// Wysiwyg
if ($pageInformationYouWantToCreate['content_text']) {
    $wysiwygComponent = new \Pimcore\Model\Document\Editable\Wysiwyg();
    $wysiwygComponent->setName(sprintf('%s:%s.text', $areaBlockName, $positionOnPageFor['wysiwyg']));
    $wysiwygComponent->setDataFromEditmode($pageInformationYouWantToCreate['content_text']);
    $editablesOnPage[] = $wysiwygComponent;
}

$blockArea->setDataFromEditmode([
    [
        'key'    => $pageInformationYouWantToCreate['headline'],
        'type'   => 'heading',
        'hidden' => false,
    ],
    [
        'key'    => $pageInformationYouWantToCreate['wysiwyg'],
        'type'   => 'wysiwyg',
        'hidden' => false,
    ]
]);

array_unshift($editablesOnPage, $blockArea);
$importPage->setEditables($editablesOnPage);

$importPage->save();